Table of Contents
You have spent weeks or months building your SaaS. The website is ready, the signup flow works, the product is finally in production and you have prepared the announcement.
Then launch day arrives.
Someone reports that signup is broken. Another person asks whether your free plan requires a credit card. Your payment notification does not arrive. A potential customer finds a bug you never encountered during testing.
Meanwhile, you still have to publish announcements, respond to questions and watch the product.
This is why a launch needs more than a marketing calendar.
A SaaS launch day checklist gives you a practical operating plan for everything that needs to happen before, during and immediately after the product goes public.
For a solo founder, the objective is not to behave like a large marketing department. It is to know what must be checked, which tasks matter most, what to do when something goes wrong and where to focus your limited attention.
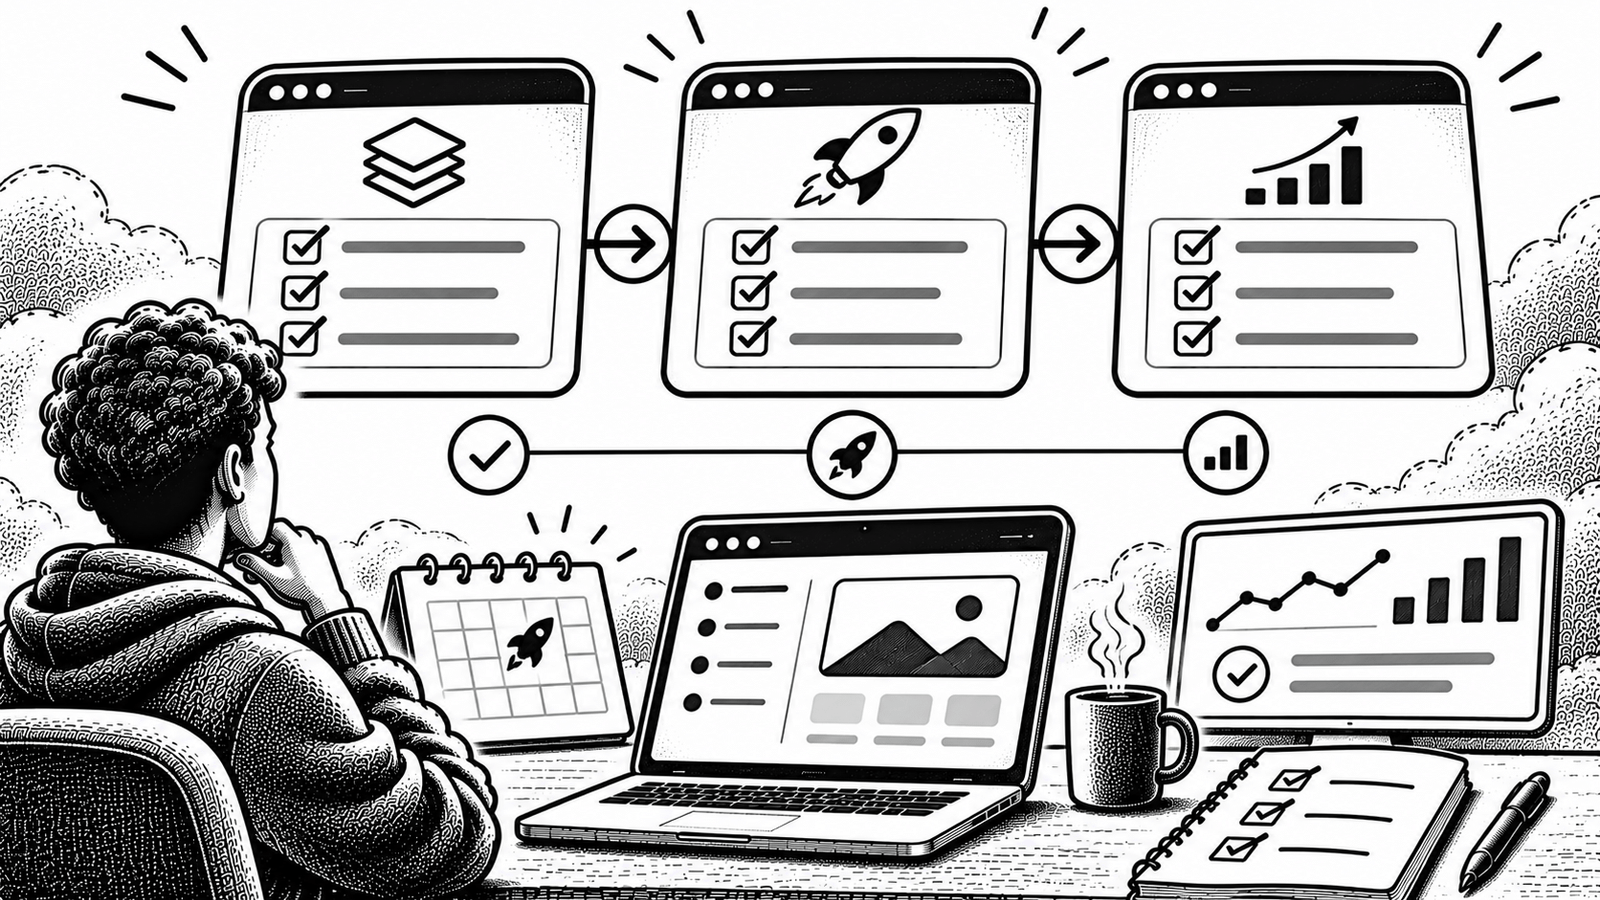
This guide provides a runbook you can adapt to your own launch, including a pre-launch checklist, go/no-go decision gate, launch-day timeline, incident response process and first-72-hours follow-up.
It is a planning framework, not a claim that following a particular schedule guarantees signups or revenue.
What Is a SaaS Launch Day Runbook?
A launch runbook is a documented sequence of tasks, checks and decisions that helps you coordinate a product release.
It answers five questions:
- What must be ready before the product goes public?
- What happens when the launch begins?
- Where will you communicate the announcement?
- How will you respond to customers and technical problems?
- What should happen after the initial attention passes?
A marketing plan tells you what you intend to communicate.
A launch runbook tells you how to execute that plan while the real product is receiving real users.
This guide focuses on launch-day execution. For the broader product preparation and distribution strategy, see How to Launch a Developer Tool.
Before Launch Day: Prepare These 11 Things
Do not wait until the morning of the launch to discover that a critical workflow is broken.
Use the day before launch to verify the product and prepare the operational details.
1. Define One Primary Launch Goal
Before announcing anything, decide what you want the launch to accomplish.
Possible objectives include:
- Get the first group of qualified users.
- Recruit additional beta testers.
- Collect feedback from a specific customer segment.
- Generate qualified demo requests.
- Validate a new product positioning.
- Introduce a paid product to an existing audience.
Do not combine every possible objective into one vague statement such as “make the launch successful.”
Choose one primary objective and a few supporting signals.
For example:
Primary goal: Get relevant independent consultants to try the scheduling product.
Supporting signals:
- Qualified website visits.
- Completed account registrations.
- First successful booking workflow.
- Relevant product feedback.
These are measurement choices, not performance targets. Decide what constitutes success using your own product and business context.
If you already have a waitlist, define how you will invite those people and what you want to learn from their first session. Our SaaS waitlist guide explains how to prepare that audience before launch.
2. Freeze Non-Essential Product Changes
A launch is not a good time to introduce several unrelated features.
Before the launch:
- Review the final release.
- Confirm the correct version is deployed.
- Avoid unnecessary dependency changes.
- Avoid large database migrations unless required.
- Confirm environment variables and production configuration.
- Document known limitations.
- Identify the last known good release and recovery procedure.
A late feature addition can create more risk than value.
If a critical bug is discovered, fix it and run the relevant verification checks. Do not ship unreviewed code just to preserve the original announcement time.
For AI-assisted projects, use the AI-generated code verification checklist before approving risky release changes.
3. Test the Real Production User Journey
A development environment working correctly does not prove the production application is ready.
Test the live product as a new customer would experience it.
| User journey | What to verify |
|---|---|
| Website visit | The homepage and important landing pages load |
| Registration | A new user can create an account |
| Login | Authentication and session handling work |
| Onboarding | The user understands the next action |
| Core workflow | The product’s main job can be completed |
| Data persistence | Saved information remains available |
| Important transactional messages arrive | |
| Billing | Relevant checkout and entitlement states work |
| Permissions | Users cannot access unauthorised data |
| Recovery | Errors provide a reasonable next step |
For payments, perform appropriate test transactions and verify the production configuration separately. Do not create a fake production charge merely to check a payment button.
For a deeper testing plan, see What to Test in a SaaS MVP.
4. Prepare the Website and Launch Landing Page
Your announcement will send people somewhere. Make sure that destination is ready.
Check:
- The product name and description are accurate.
- The first headline explains who the product serves.
- The main call to action works.
- Screenshots show the real product.
- Pricing and trial details are accurate.
- Terms and privacy links work.
- Contact and support information is accessible.
- The page works on mobile.
- There are no broken links or placeholder sections.
A visitor should understand the product without having to read an entire announcement.
Do not make the landing page promise functionality that is still under development.
For more on diagnosing the live product page, read SaaS Landing Page Conversion Rate.
5. Prepare Your Launch Announcement
You do not want to write the main announcement while simultaneously trying to resolve production problems.
Prepare the essential assets before launch.
| Asset | Purpose |
|---|---|
| Main announcement | Explain the product and its availability |
| Short social posts | Share the launch with relevant audiences |
| Product screenshots | Show the actual interface |
| Product demonstration | Help visitors understand the workflow |
| Product description | Explain who the product serves and what it does |
| FAQ | Answer predictable questions |
| Direct product URL | Give interested users a clear destination |
| Support message | Explain where people can report problems |
Use one consistent description across your important channels.
A good launch announcement should answer:
- What did you build?
- Who is it for?
- What problem does it address?
- What makes the approach useful?
- What can people do next?
Avoid exaggerated statements such as “the world’s most revolutionary platform” unless you can substantiate them.
6. Prepare Your Distribution Channels
Do not publish everywhere simply because every platform is available.
Select the channels where your target customers are most likely to see the announcement.
Possible channels include:
- Your existing email list.
- Your X profile.
- Relevant professional communities.
- Product Hunt.
- Relevant industry newsletters.
- Your own website and blog.
- Existing customer or beta-tester networks.
Check the rules of each platform or community before scheduling promotional material.
For Product Hunt specifically, its current official launch guide explains the submission process, preparation, timing, first comment and post-launch follow-up. It also explicitly warns against asking people directly for upvotes.
Do not confuse distribution with spam. Send relevant announcements to audiences who have an appropriate reason to receive them.
7. Prepare Analytics and Event Tracking
You need to understand what happens after people click your announcement.
At a minimum, make sure you can distinguish:
- Landing-page visits.
- Account registrations.
- Completed onboarding.
- First successful product action.
- Demo or trial requests.
- Paid conversions, where applicable.
Use consistent UTM parameters for campaign links.
Example:
Replace example.com with your product domain.
Google’s Campaign URL Builder documentation explains how these parameters help identify campaign traffic in Analytics.
Before launch, click your own tagged links and confirm that the destination and tracking work. Do not assume that a visible analytics dashboard means all the events are being recorded correctly.
For the wider measurement framework, see Launch Metrics to Track.
8. Prepare Support and Communication
You do not need a large support operation, but people need a way to reach you.
Prepare:
- A monitored support email.
- A working contact form, if used.
- A short FAQ.
- A way to report bugs.
- A method for collecting product feedback.
- A clear statement of support availability.
If you are a solo founder, be honest about response times.
Do not promise 24-hour support when you cannot provide it.
Also prepare a short communication template for unexpected downtime:
We’re investigating an issue affecting [specific feature]. Existing users may experience [known impact]. We’re working on the problem and will share another update when we have verified more information.
Only publish details you have verified. Do not speculate about customer data or security incidents.
9. Prepare a Recovery and Rollback Plan
Things can go wrong after release even when the pre-launch checks pass.
Know what you will do if:
- Registration stops working.
- Payment processing fails.
- A critical workflow becomes unavailable.
- A database migration introduces a problem.
- Users see another customer’s data.
- An integration stops working.
- A recent deployment causes errors.
Identify:
- What qualifies as a launch-blocking issue.
- Which previous release can be restored.
- Which person has permission to perform the recovery.
- How customers will be informed.
- How you will verify that the recovery worked.
For a solo founder, these may all be your responsibilities. Writing them down still helps.
Google’s Site Reliability Engineering release guidance discusses repeatable release processes and safe recovery. Its canarying guidance explains how staged rollouts can reduce the impact of a defective change.
10. Confirm the Launch Team or Your Own Availability
If you have collaborators, assign responsibilities before launch.
A simple arrangement could look like this:
| Responsibility | Owner |
|---|---|
| Release and deployment | Technical owner |
| Website and announcement | Marketing owner |
| Customer questions | Support owner |
| Analytics monitoring | Measurement owner |
| Incident decision | Release owner |
One person may hold multiple roles.
If you are completely solo, write down the same responsibilities for yourself and set realistic availability windows.
Do not promise to monitor every platform every minute.
Set specific check-in periods and take breaks. A launch that exhausts the founder before the first customer question is not a good operating plan.
11. Create a Final Go/No-Go Decision
Before the announcement goes public, decide whether the product is ready.
| Gate | GO condition | NO-GO condition |
|---|---|---|
| Critical product flow | Main workflow works in production | Signup or core workflow is broken |
| Data and security | Important access boundaries are verified | Customer data may be exposed |
| Payment | Advertised payment flow works where applicable | Customers cannot complete or trust the payment process |
| Website | Correct product information and working CTA | Broken destination or misleading offer |
| Support | A real contact route exists | No way to report a serious problem |
| Recovery | Known recovery path exists | No safe way to handle a critical release failure |
| Announcement | Claims match the actual product | Features or availability are misrepresented |
A NO-GO decision does not mean your product has failed. It means the launch should wait until the blocking issue is resolved.
Do not delay indefinitely for cosmetic perfection. Distinguish launch-blocking problems from improvements that can safely happen later.
The SaaS Launch Day Runbook
Once the preparation is complete, use a simple timeline.
The times below are relative to your chosen launch moment. They are suggested checkpoints, not universal rules about the ideal time to publish.
| Timing | Action | Expected outcome |
|---|---|---|
| T-24 hours | Final release review and announcement preparation | Known release candidate and ready assets |
| T-2 hours | Production smoke test | Main user journeys checked |
| T-30 minutes | Verify links, analytics and support routes | Launch destinations confirmed |
| T-0 | Publish primary announcement | Product becomes publicly discoverable |
| T+30 minutes | Check important user journeys and incoming questions | Early problems identified |
| T+1–2 hours | Review feedback and technical signals | Issues classified and answered |
| T+4 hours | Check distribution and visitor behaviour | Understand early response |
| T+8 hours | Share a useful update if warranted | Keep interested people informed |
| T+24 hours | Review signups, activation and support | Initial learning recorded |
T-2 hours: Run the final smoke test
Do not use the final two hours to add features.
Check the exact production URL.
Visit the website, create a test account using the approved procedure, complete the core workflow, confirm important email delivery and verify that the main CTA works.
If the product uses external integrations or payments, verify the relevant production configuration and use test-mode operations wherever appropriate.
T-30 minutes: Check your distribution links
Open every important destination:
- Main announcement URL.
- Product landing page.
- Signup page.
- Documentation.
- Product demo.
- Support contact.
- Waitlist or early-access link, if applicable.
A broken destination can turn an otherwise useful announcement into a frustrating experience.
T-0: Publish the primary announcement
Start with your main launch channel.
Make the announcement clear and factual.
For example:
We just launched [Product].
It’s built for [specific audience] who struggle with [specific problem].
It helps them [specific outcome] through [brief explanation of how it works].
We’re opening access today and would appreciate feedback on [specific aspect].
[Product URL]
This is a template, not copy to use without replacing the placeholders.
If launching on Product Hunt, follow its current submission and community rules. Invite genuine feedback rather than asking people to manipulate votes or rankings.
T+30 minutes to T+2 hours: Stay available
Your first job is to help people who genuinely want to understand or try the product.
Respond to:
- Product questions.
- Pricing questions.
- Setup problems.
- Feature requests.
- Confusing points in the announcement.
- Reports of broken functionality.
Record repeated questions. If five people misunderstand the same feature, that may reveal a problem with your positioning or onboarding.
Do not change the product in response to every individual suggestion. Record the feedback and look for patterns.
T+4 to T+8 hours: Review the response
Look at whether the right people are arriving and taking the expected next step.
A high number of impressions is not proof that customers have received value.
Separate:
- Reach.
- Qualified visits.
- Registrations.
- Activation.
- Paid conversion, where relevant.
- Support issues and feedback.
Use the data to decide whether to continue distributing, clarify the message or investigate a product issue.
For a more detailed measurement plan, use the published launch metrics guide.
What to Do When Something Breaks on Launch Day
A launch-day problem does not automatically mean the entire launch has failed.
What matters is how you respond.
Use this sequence.
Step 1: Identify the actual impact
Find out which users and workflows are affected.
Do not assume that a report represents a site-wide outage.
Step 2: Stop making unrelated changes
If the issue appeared after a recent deployment, avoid stacking additional feature changes on top of an unstable release.
Step 3: Decide whether to mitigate or roll back
For a critical issue, restoring the last known good release may be safer than trying to debug a broken production version while users are affected.
Use the recovery method you have already tested. A rollback can itself be risky when a database migration or external state change is involved.
Step 4: Communicate accurately
Explain what is affected, what users should do and when you expect to provide another update.
Do not invent an estimated recovery time.
Step 5: Verify the recovery
Retest the exact workflow that failed.
Confirm that the product works again before describing the incident as resolved.
For a deeper investigation process, read How to Debug a SaaS in Production.
The First 72 Hours After Launch
Publishing the announcement is not the end of the launch.
The first three days provide an opportunity to understand what people expected, what they actually tried and what they need next.
First 24 hours: Record what happened
Document:
- Where traffic came from.
- Which announcements produced relevant conversations.
- Which product workflows were used.
- Which questions appeared repeatedly.
- Which errors occurred.
- Which users completed the first meaningful action.
Keep observations separate from explanations.
For example:
Observation: Several people visited the pricing page but did not register.
Hypothesis: The pricing structure may not be clear enough.
Do not immediately write “pricing is the reason conversions are low” without further evidence.
24–48 hours: Follow up with interested people
Contact people who asked questions, joined a waitlist or agreed to try the product, according to the permissions and expectations they gave you.
Ask focused questions:
- Did you reach the result you expected?
- What was confusing?
- Which part of the workflow took longer than expected?
- What would you need before using this regularly?
Do not turn every feedback conversation into a sales pitch.
48–72 hours: Choose the next improvement
Review the evidence and decide what deserves attention.
Possible actions include:
- Fix a product blocker.
- Improve the landing-page message.
- Simplify the signup experience.
- Clarify the documentation.
- Improve onboarding.
- Schedule another conversation with a suitable potential customer.
- Prepare a second distribution activity.
Avoid changing five things at once. Choose the most important improvement and define how you will verify it.
After this period, your launch retrospective can turn the experience into a more structured review.
Copyable SaaS Launch Day Checklist
Use this checklist in your project tracker or notes application.
One day before launch
- Primary launch objective is defined.
- Release candidate is identified.
- Non-essential feature changes are frozen.
- Production signup works.
- Login and logout work.
- Core workflow is verified.
- Payment and entitlement states are verified where applicable.
- Critical permissions are checked.
- Website and CTA work on mobile.
- Launch announcement is ready.
- Product screenshots and demo are ready.
- Distribution rules have been reviewed.
- Campaign links and analytics have been tested.
- Support channel is accessible.
- Known limitations are documented.
- Recovery and rollback path is understood.
- Go/no-go decision is recorded.
Launch day
- Final production smoke test completed.
- All important links checked.
- Announcement published.
- Support messages monitored.
- Product questions answered.
- Important errors recorded.
- Technical signals reviewed.
- Customer feedback captured.
- No unverified performance claims published.
- Breaks and realistic response times planned.
First 72 hours
- Traffic sources reviewed.
- Qualified visits reviewed.
- Signup and activation reviewed.
- Product issues classified.
- Interested users followed up with appropriately.
- Repeated questions documented.
- Highest-priority product improvement selected.
- Launch retrospective scheduled.
Frequently Asked Questions
How early should I prepare for SaaS launch day?
Prepare the product, audience, announcement and operational checklist before the public release. The exact preparation period depends on your product and launch channel. A Product Hunt launch, for example, may require account preparation and community participation well before the scheduled date.
What should a solo founder do on launch day?
A solo founder should prioritise production verification, publishing the main announcement, answering relevant questions, monitoring critical workflows and recording feedback. Avoid trying to manage too many promotional channels simultaneously.
Should I launch on Product Hunt and X on the same day?
You can, but make sure the product and announcements are ready for each audience. Product Hunt has its own submission and community rules. X may be more useful for sharing the build story and reaching an existing audience. Choose based on your target users and available attention.
What if nobody visits after the announcement?
First verify that the links work and that the announcement reaches the audience it was written for. Then review positioning, distribution and the relevance of the audience. Do not automatically assume that the product needs more features.
What if I discover a serious bug after launch?
Assess the impact. If a critical user journey or security boundary is broken, pause promotional activity and use the safest tested mitigation or rollback procedure. Communicate accurately and verify the recovery before declaring the issue resolved.
Is launch day the most important day for a SaaS?
Launch day creates an opportunity for discovery and feedback, but long-term outcomes depend on whether customers experience value, continue using the product and are willing to pay. The days after launch deserve just as much planning.
Final Takeaway
A good SaaS launch day does not require a large team or a complicated campaign.
It requires a product that is ready for real users, a clear announcement, working distribution links, a way to respond to feedback and a recovery plan for unexpected problems.
Prepare the important details early. Keep the launch-day workload realistic. Watch the customer journey rather than only the traffic spike. Use the first 72 hours to identify what deserves improvement.
The goal is not to make one day look successful. It is to turn the launch into the beginning of a useful relationship with your first customers.
Explore more IndieOS Launch guides for waitlist preparation, beta testers, launch measurement and post-launch learning.
Sources and further reading
- Product Hunt: Launch Guide — current submission preparation, launch-day engagement and post-launch follow-through.
- Product Hunt: Preparing for Launch — scheduling, content preparation, first comments and platform rules.
- Google SRE: Release Engineering — repeatable releases, controlled release processes and recovery.
- Google SRE Workbook: Canarying Releases — evaluating changes with limited production exposure.
- Google Analytics: Campaign URL Builder — campaign measurement and UTM parameters.
Platform guidance checked on 4 November 2026. Check current platform instructions and community rules immediately before your own launch.